
Registering vinyl graphics can make applying multiple panels across a large graphic laborious. The good news is, we’re here to make your life easier! Today, we’re covering the fundamentals for registering vinyl graphics from creating the perfect registration mark to removing the liner. Here is it, our Basic Guide to Registering Vinyl Graphics.
Key Terms
We have outlined key terms that you will need to know to better understand how to register vinyl graphics.
- Bleed – excess print that is trimmed away when the film is cut to final size.
- Substrate Size – the size of the area to be applied on a substrate.
- Skew – the wall or substrate, is level, square, etc.
- Overlap – the amount of film that covers the next panel.
- Registration Point – Easily identifiable, unique shape/line along the edge of a print in the overlap.
- Key Panel – starting panel, usually determined by key graphic element or edge of the panel.
- Tack Point – tape or exposed adhesive that will hold the panel to the wall or substrate during registration.
Registering Vinyl Graphics 101
Registering vinyl graphics, when used in wide format printing means, to adjust to secure exact correspondence. Printed graphics are designed to fit a specific substrate, but large graphics will have multiple printed panels requiring you to register/align your graphic to a substrate before installation. But, why is registering appropriately critical to a successful installation? If not appropriately navigated, registering panels will take longer, then applying the panel or require removal and reinstallation. Knowing how to register your graphic properly will lower application time and increase quality and efficiency.

How to Register Vinyl Graphics
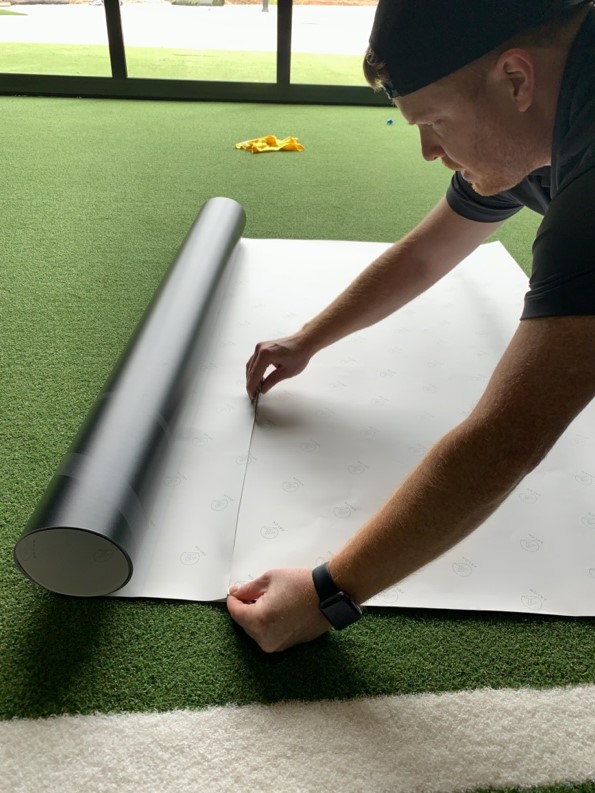
Step One – Layout and lineup your graphic by each panel on a clean table or flat surface, or two panels at a time, space allowing.
Step Two – Identify three registration points on each overlapping edge of the panels, a high, middle, and a low on the panel and fit them together.
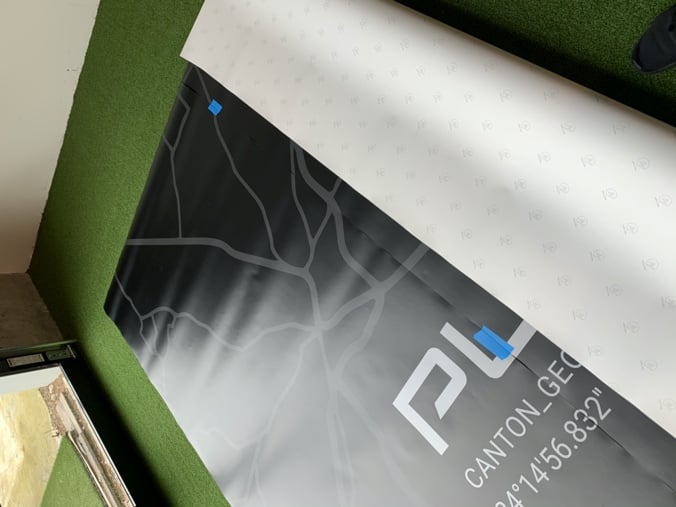
Step Three – Use tape or a Stabilo pencil to make marks near the registration point. Tape works best and can be cut with a squeegee to release and maintain marks. The tape now becomes your general registration point.
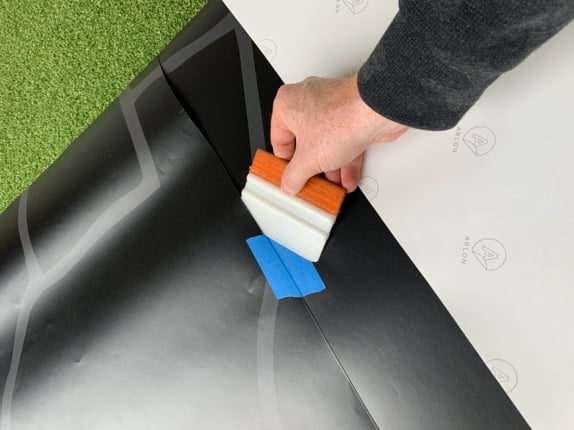
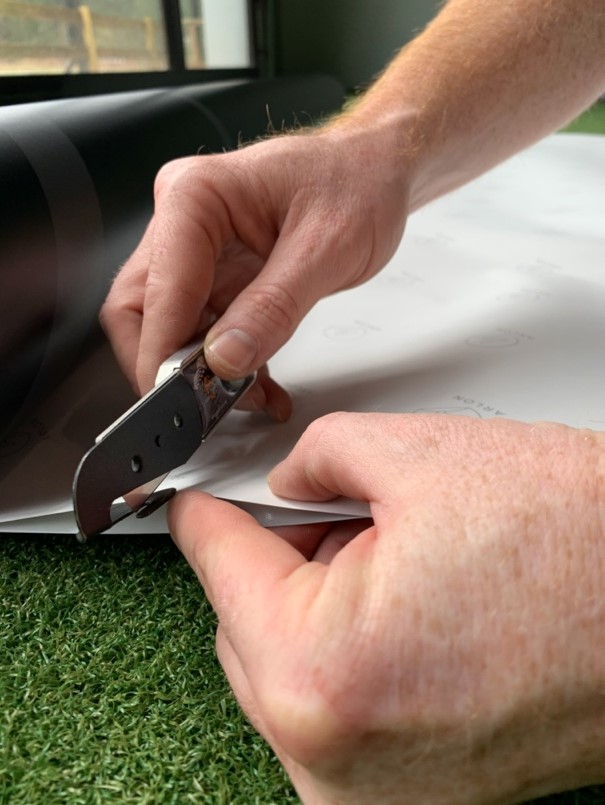
Step Four – Using a liner knife, make a single cut in the liner 3″ – 5″ (7 cm – 13 cm) below your high registration point. This should be done prior to mounting to the substrate.
Step Five – Using tape or exposed adhesive, fit your key panel to the wall or substrate right above or below your registration marks. If you use the area of the registration marks, you run the risk of removing the mark or distorting the film with the registration mark on it.
Step Six – Once the panel is fitted with no tension, release any lower tack points of the panel and pull the liner from the liner slit just under the first registration or tack point. Pull the liner tight against itself with even tension.
Step Seven – Once you have exposed 8″ – 10″ (20 cm – 25 cm) of adhesive while pulling the liner, begin application at the point of the liner slit. Work down the panel and then remove the liner and apply the upper 15-20% of the panel.
Step Eight – Remove the visible registration marks and repeat the process for each remaining panel.

As you can see, the proper registration of vinyl graphics can save you time, frustration, and increase your productivity.
Are you installing wall graphics? Before you take the above steps on vinyl graphic registration, make sure you watch our video on how to test your wall for media compatibility.


