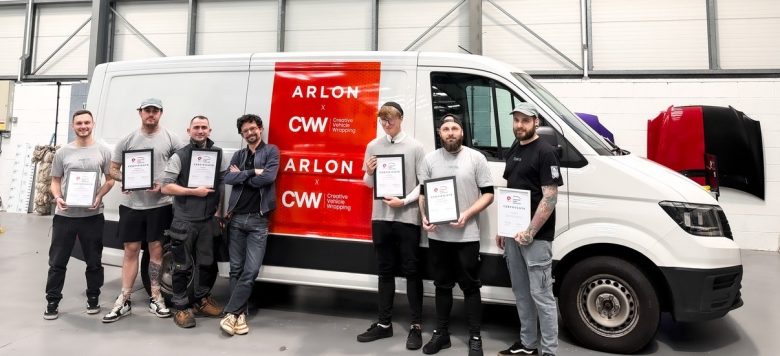
Tag Archives: vinyl graphics

Manufacturing

Cast or Calendered Film – What to use for a Vehicle Wrap

Before there was the question of which vinyl film to use on a vehicle wrap, paint was the only media of choice.  Fast-forward 70 years, factor in massive technological advances in adhesives and liners, we have today’s vehicle wrap films. With new technologies come new questions, such as do I need to use a Cast or Calendered product? And does a Cast film have the same service life as a Calendered film? If you ask yourself these questions before starting your vehicle wrap, you’re in the right place. We’re going to be answering these questions and more.

Vehicle Wrap Durability

Durability is the main driving factor when selecting a vehicle wrap film. Calendered film is designed with a short to mid-term range of durability (0-5 years); the film can also shrink up to 1/4”. Calendered film is an excellent option for short-term lettering, spot decals, or partial wraps. Full vehicle wraps require strategic paneling and seaming (piecing together) of the film over complex curves and bumpers.

Cast films are manufactured for long term use (5-11 years); when compared to Calendered, this vinyl will have immeasurable shrinkage. For long-term, full, seamless vehicle wraps, or long-term lettering, decals, and partial wraps Cast vinyl is a must.

How can you maintain the durability of a Cast or Calendered Film? When using an overlaminate, be sure to choose one of equal or better quality than the base film. Using a lower quality laminate will dramatically shorten the durability of the high-quality base film.

SLX Cast Wrap with Series 3270 Matte - Wrapped by Sign Biz WA
Vehcile Wrapped in a Cast film – SLX® Cast Wrap with Series 3270 Matte – Wrapped by Sign Biz WA

Cost Factor

Price can be the determining factor between bidding on or winning a job. When cost-driven opportunities are presented, and it’s short term, a Calendered film could be your vinyl of choice. If you select a Cast film over a Calendered for your vehicle wrap project, don’t be deterred by the cost. For the added durability, the increase is insignificant in mid to long term applications. The difference in price can also balance out in a few years when it is time for removal. Yes, removal.

Removal

Time is valuable, and using your time to remove a difficult vehicle wrap can be less than ideal. Why is the removal of Calendered film different than Cast? Calendered film can remove poorly due to the loss of essential polymers and plasticizers that give the film its durability. Also known as rot. Once this happens, the film is prone to come off in tiny pieces, leaving adhesive.

Choosing the right vehicle wrap film can make all the difference in the long-term profitability and workflow of your business.  Customers change, but the one thing that usually stays the same is the type of vehicle graphics. You now have the information you need to make an informed decision when selecting and purchasing a vehicle wrap film.   

Share This:

Read More
Wall Applications

Basic Guide to Registering Vinyl Graphics

Registering vinyl graphics can make applying multiple panels across a large graphic laborious. The good news is, we’re here to make your life easier! Today, we’re covering the fundamentals for registering vinyl graphics from creating the perfect registration mark to removing the liner. Here is it, our Basic Guide to Registering Vinyl Graphics.

Key Terms

We have outlined key terms that you will need to know to better understand how to register vinyl graphics.

  • Bleed – excess print that is trimmed away when the film is cut to final size.
  • Substrate Size – the size of the area to be applied on a substrate.
  • Skew – the wall or substrate, is level, square, etc.
  • Overlap – the amount of film that covers the next panel.
  • Registration Point – Easily identifiable, unique shape/line along the edge of a print in the overlap.
  • Key Panel – starting panel, usually determined by key graphic element or edge of the panel.
  • Tack Point – tape or exposed adhesive that will hold the panel to the wall or substrate during registration.

Registering Vinyl Graphics 101

Registering vinyl graphics, when used in wide format printing means, to adjust to secure exact correspondence. Printed graphics are designed to fit a specific substrate, but large graphics will have multiple printed panels requiring you to register/align your graphic to a substrate before installation.  But, why is registering appropriately critical to a successful installation? If not appropriately navigated, registering panels will take longer, then applying the panel or require removal and reinstallation. Knowing how to register your graphic properly will lower application time and increase quality and efficiency.

How to Register Vinyl Graphics

Step One – Layout and lineup your graphic by each panel on a clean table or flat surface, or two panels at a time, space allowing.

Step Two – Identify three registration points on each overlapping edge of the panels, a high, middle, and a low on the panel and fit them together.

Step Three – Use tape or a Stabilo pencil to make marks near the registration point. Tape works best and can be cut with a squeegee to release and maintain marks. The tape now becomes your general registration point.

Step Four – Using a liner knife, make a single cut in the liner 3″ – 5″ (7 cm – 13 cm) below your high registration point. This should be done prior to mounting to the substrate.

Step Five – Using tape or exposed adhesive, fit your key panel to the wall or substrate right above or below your registration marks. If you use the area of the registration marks, you run the risk of removing the mark or distorting the film with the registration mark on it.

Step Six – Once the panel is fitted with no tension, release any lower tack points of the panel and pull the liner from the liner slit just under the first registration or tack point. Pull the liner tight against itself with even tension.

Step Seven – Once you have exposed 8″ – 10″ (20 cm – 25 cm) of adhesive while pulling the liner, begin application at the point of the liner slit. Work down the panel and then remove the liner and apply the upper 15-20% of the panel.

Step Eight – Remove the visible registration marks and repeat the process for each remaining panel.

As you can see, the proper registration of vinyl graphics can save you time, frustration, and increase your productivity.

Are you installing wall graphics? Before you take the above steps on vinyl graphic registration, make sure you watch our video on how to test your wall for media compatibility.

Share This:

Read More
Vehicle Applications

Boat & Watercraft Wrap Applications

Vinyl wraps have become increasingly popular on boats and watercraft’s, making them the everyday option over paint.  When comparing the cost of painting, a boat wrap will save you time, are long-lasting, and a fraction of the price.

With no surprise installing on a boat or watercraft is very different from installing on a vehicle. If you’re planning on wrapping one of these, take a moment to read our current list of best practices ensure you’re on the right track.

Boat wrapped in DPF 6100XLP
Wrapped by Paul Oliver of Anchored Designs using DPF 6100XLP

Before we jump into the best practices, let’s break down the benefits.

Benefits of a Boat Wrap

Customization: Whether you’re promoting your business or looking to stand out, the customization options are endless.

Ease: Unlike paint, if your vinyl wrap gets scratched, you can replace the wrap reasonably quickly. 

Eco-Friendly:  Marine paints are toxic to marine life; making vinyl boat wraps the effective eco-friendly alternative.

Value: If the time comes of reselling your boat that has a custom wrap, the wrap can be easily changed when sold.  Your wrap will add value by saving the future owner a costly paint job.

Boat Wrapped in SLX Cast Wrap
Wrapped by Nukem Graphics using SLX® Cast Wrap

Best Practices

Measure Twice:  Unlike vehicles, boats and watercraft’s don’t have easy to find templates and have sharp edges. If you can’t find a template for your boat, be sure to take accurate measurements. 

Clean, Clean, Clean: Always clean and prep any surface before installing vinyl. Clean your boat or watercraft by following the steps found here on Perfecting Your Vehicle Prep.

Thick Overlaminate : Use a 2-mil (50 micron) cast overlaminate for max abrasion resistance; a thicker overlaminate will protect the vinyl from being torn on small items found in the water. 

Over-lap Seams:  At the front of the watercraft or boat, over-lap the two seams of the vinyl by one inch. Overlapping the seam that gets the most wear and tear will help prolong your wrap and leave less room for lifting.  

Waterline: Vinyl is relatively resilient, but it can be damaged if kept in water 24/7, ensure the longevity of your boat wrap by keeping it one inch above the waterline.

Boat wrapped with SLX Cast Wrap
Wrapped by Nukem Graphics using SLX® Cast Wrap

From boats to jet-skis, stand out on the water this summer with an eye-catching vinyl wrap. 

Share This:

Read More
Digital Printing Wall Applications

7 Easy Tips & Tricks for Weeding Small Letters & Decals

7 Tips and Tricks - Weeding Letters and Decals

Do you know the hardest part of making small decals and letters? Weeding!

If you are not familiar with weeding, it is removing all excess material from any decal or graphics that are cut-to-shape. Weeding small letters and decals can be a difficult task, but learning how to weed small letters and decals is crucial knowledge to have in the sign industry.

Here’s a rundown of our best tips whether you’re looking to take a design to the next level or need a refresher on weeding small letter and decals follow these tips and tricks below.

1. You need the proper tools, having the right tools will make your weeding a breeze. Our technical experts agreed that the YelloHook from YelloTools is the perfect addition to any tool kit.

Man weeding letters

2. Choose the correct vinyl with a tight liner release. A firm liner release ensures that small decals stay down during weeding, and allows you to weed with greater confidence and speed. Arlon recommends all of our cut graphics, and for print, we recommend DPF 6000RP White.

3. Check on your machine; confirm that your blade is in pristine condition. Using a dull blade will lead to poorly cut decals and make the weeding process very difficult.

4. Before starting your job, perform a depth cut test. Running a cut test ensures that the vinyl cuts thoroughly and that the decal is not attached to the excess material.

Pressing a button on a weeding machine

5. Weed directly after cutting, waiting too long to weed after cutting will allow the adhesive to flow back, causing the design to lift with the excess vinyl.

6. Try your best to keep your fonts simple; try using Sans Serif fonts. The sharper the edges on a font, the longer your weeding process will be.

Hands weeding a white vinyl

7. All of these tips are important to the weeding process, but it all comes back to one thing, patience. Take your time when weeding small decals and letters, essential but straightforward, weeding is a time-consuming task that is done best when you’re taking your time.

What are your favorite tips and tricks for weeding small letters? Let us know in the comments below.

Share This:

Read More
Translate »